Why I Started
For years, my family and I relied on Google Photos, eventually upgrading to Google One to meet our growing storage needs. But even with the expanded plans, storage always felt limited and expensive. I wanted a long-term solution: something secure, scalable, and personal. That’s what led me down the rabbit hole of self-hosting.
A shoutout to my friend Madhav who introduced me to the world of self-hosting and guided me through the setup process.
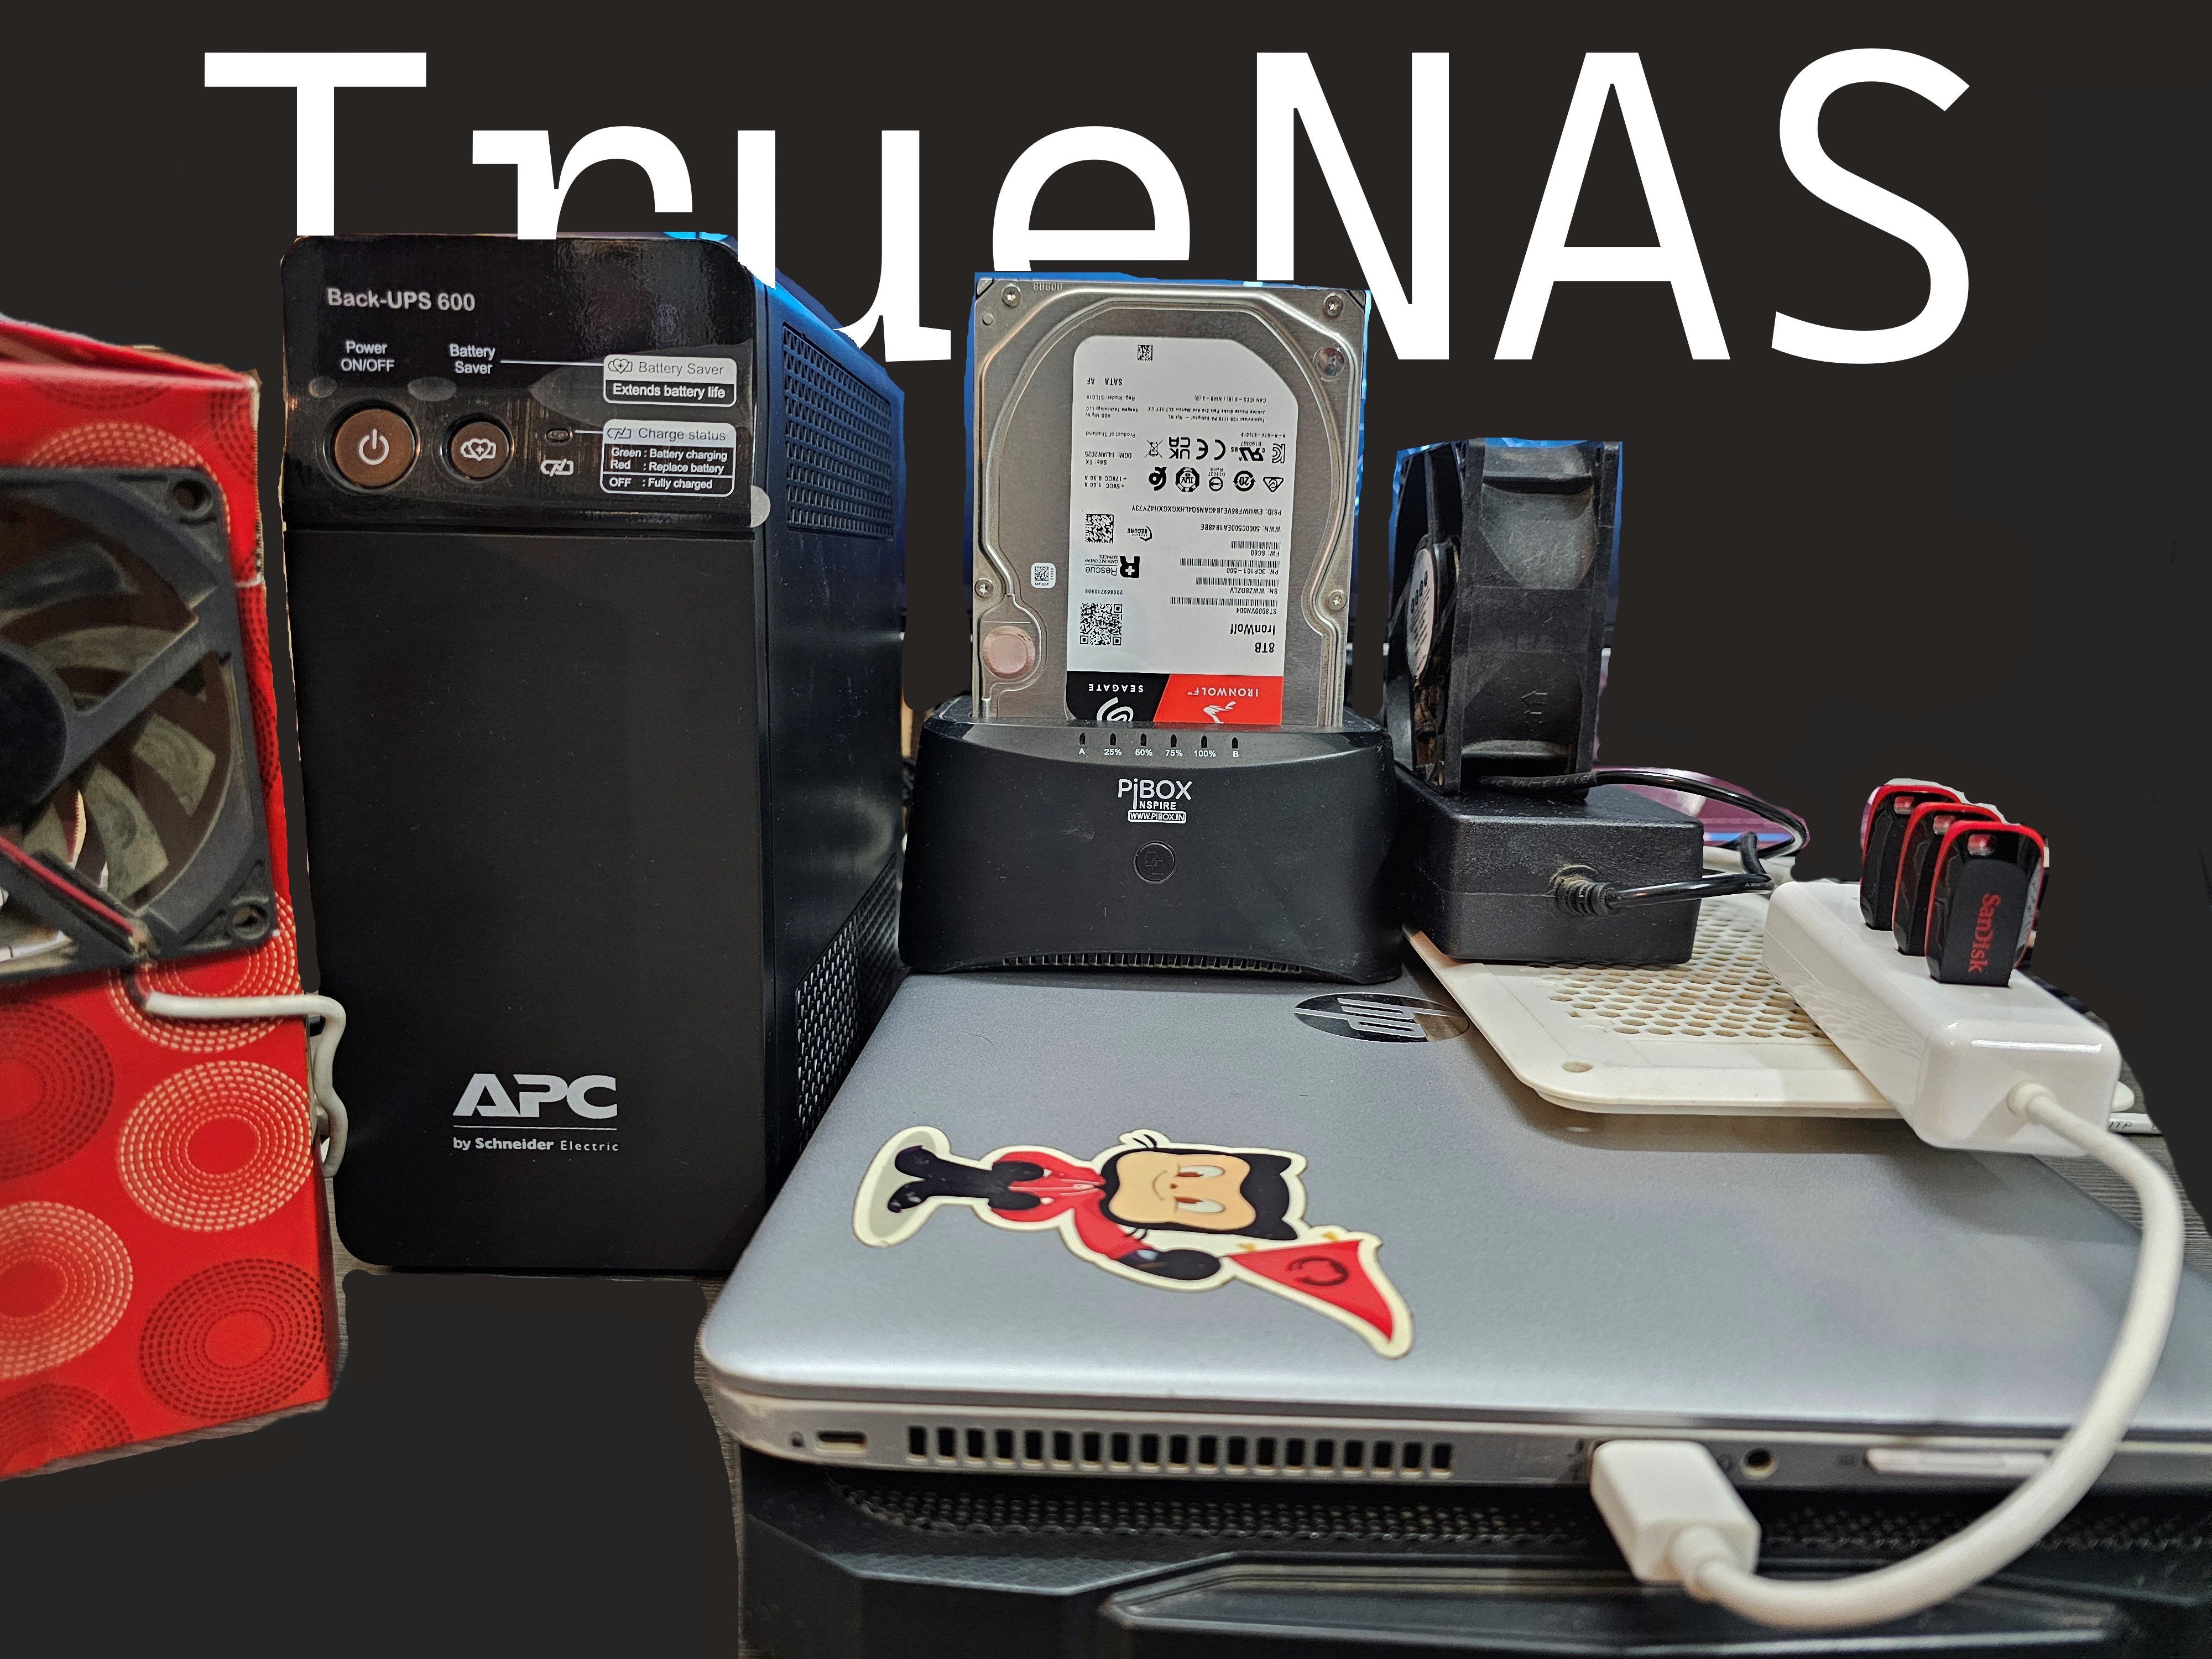
Hardware: Building the Foundation
I repurposed an old laptop as the host machine and built a custom NAS using TrueNAS SCALE. It now powers a personal, resilient storage and services system for my entire household.
Parts I Procured
| Component | Description | Cost (INR) | Cost (USD approx) |
|---|---|---|---|
| UPS | Provides 15 min backup for graceful shutdown | ₹3,200 | ~$38 |
| Read Cache SSD | 500 GB SSD to boost read speed (optional) | ₹2,500 | ~$30 |
| Ethernet Cables (x2) | For bonding & network redundancy | ₹200 | ~$2.5 |
| USB Hub | 3 USB + 1 Gigabit Ethernet | ₹1,600 | ~$19 |
| Dual Bay HDD Dock | PiBox USB 3.0 for main storage | ₹1,800 | ~$21 |
| Cooling Fan | Cabinet USB fan to maintain thermals | ₹400 | ~$5 |
| 2x 8 TB NAS HDDs | Seagate IronWolf, mirrored setup | ₹16,200 each | ~$200 each |
Image: Disk list and topology overview
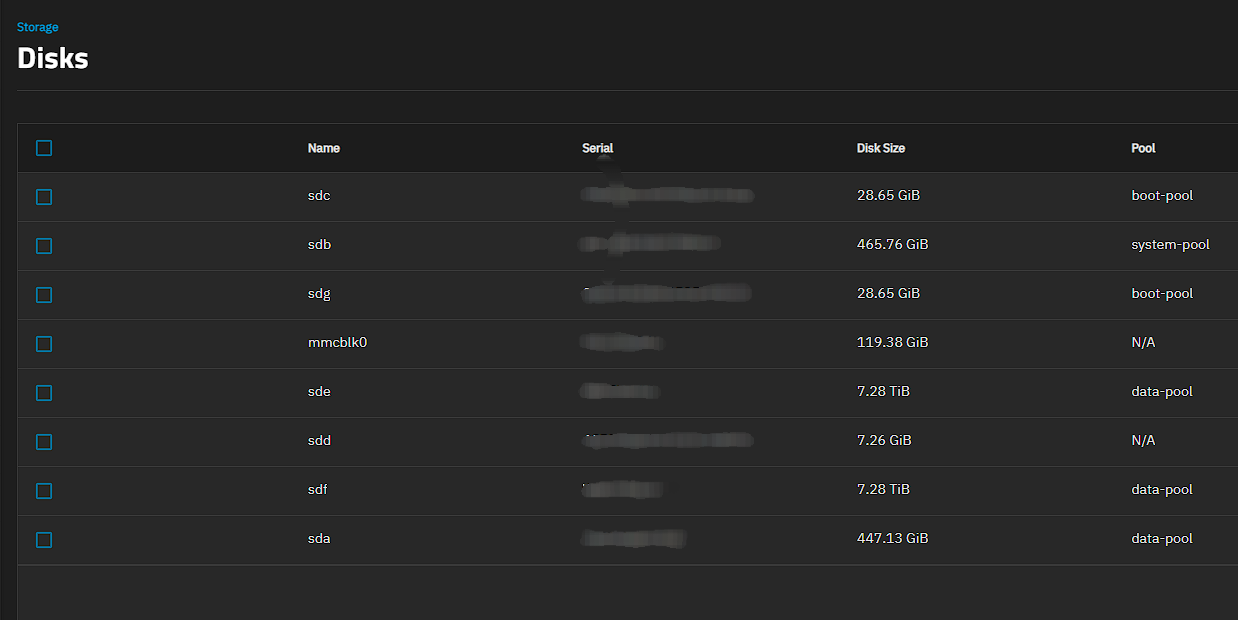
Image: Pool configuration
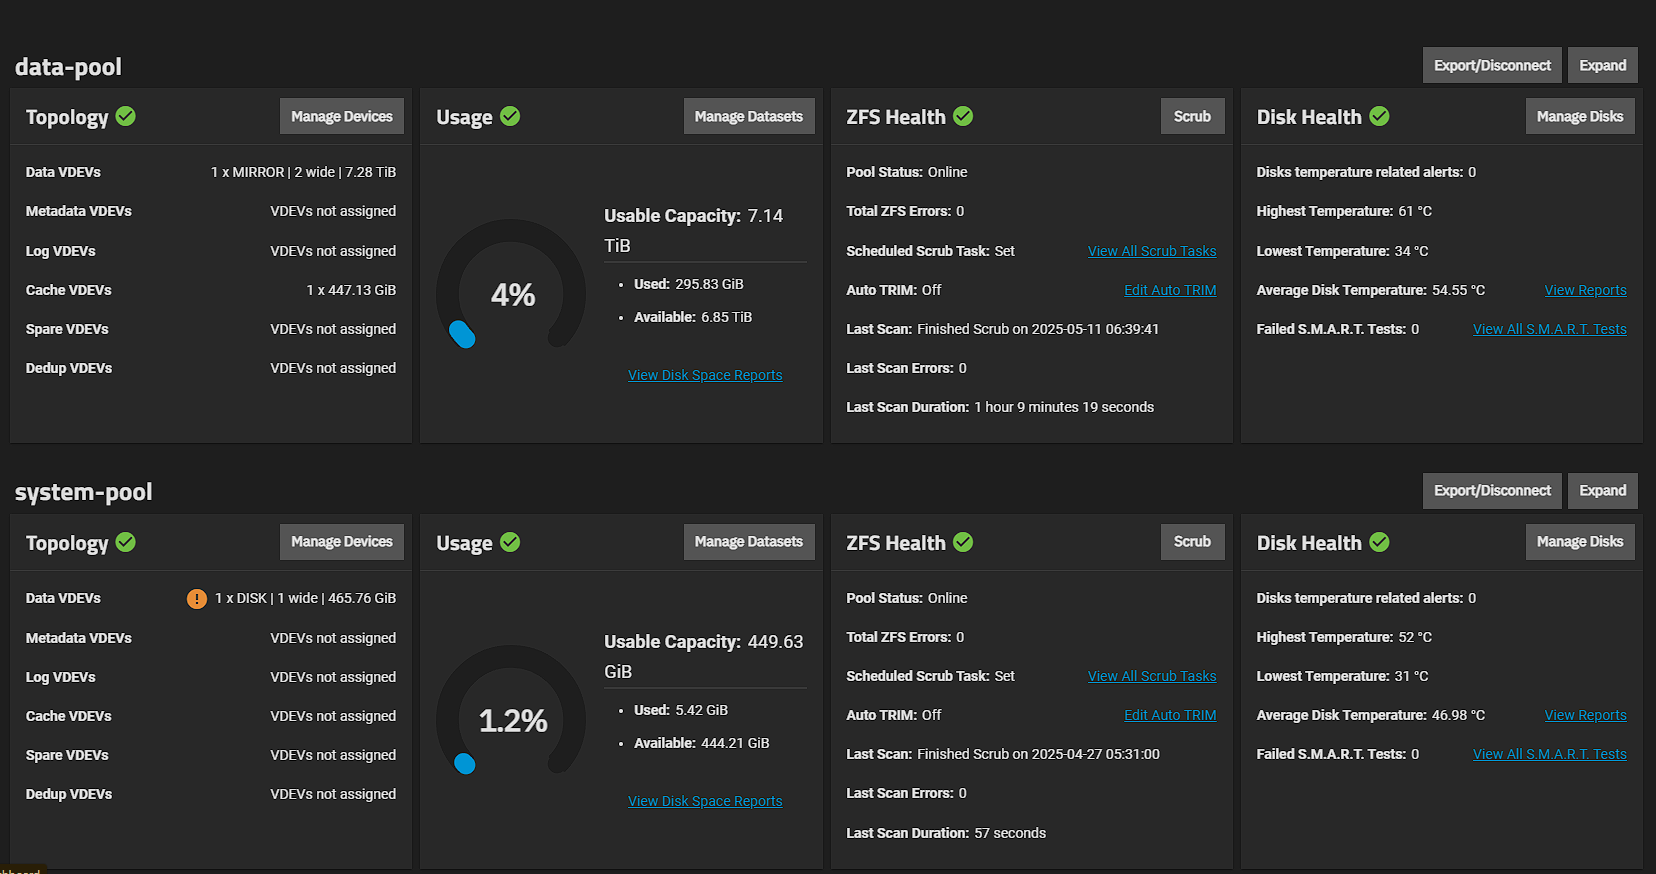
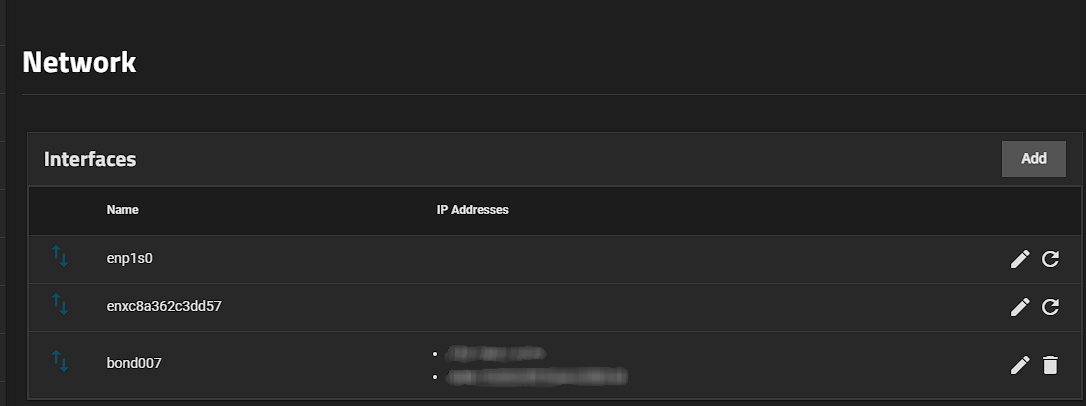
Redundancy: Data + Network Resilience
- Network Bonding: Created a bonded interface (
bond007) combining two NICs. This provides redundancy and additional bandwidth, improving reliability and speed. - Storage Redundancy: The
data-poolis configured using a MIRROR VDEV (RAID1 equivalent), meaning both 8 TB drives contain identical data. If one fails, the other continues. - Future Backup Plan: I plan to sync data to a Madhav's remote TrueNAS using ZFS replication, creating offsite protection.
Image: Network bonding configuration
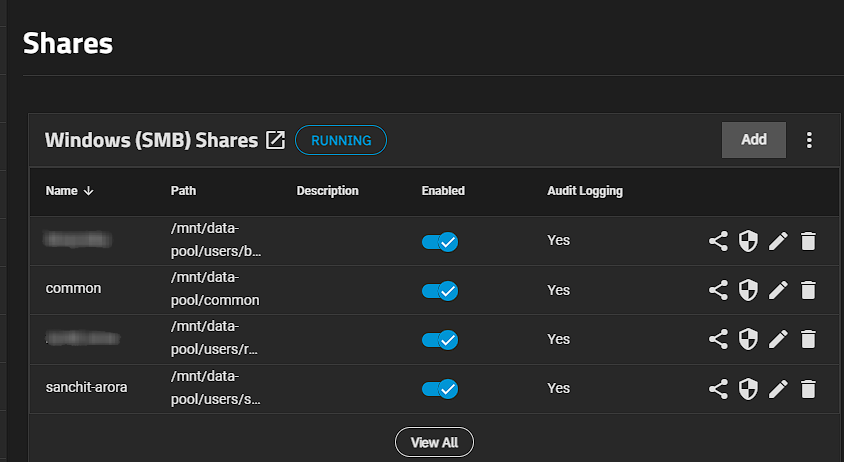
Privacy & Access Controls
Every aspect of access is designed with user privacy in mind:
- SMB (Samba) Shares are ACL-isolated: each family member has a private space (e.g.,
/users/sanchit-arora), with a separate shared folder (/common) for movies and files. - Audit logging is enabled across shares.
- No one sees what they're not supposed to.
Image: SMB Shares configuration
Functionalities: More Than Just Storage
Self-hosting is more than just a file dump - it is also a smart, extensible home cloud. Here are some of the features I implemented:
1. Cross-Platform File Access
Using Samba (SMB), files are seamlessly available across:
- Android (via CX File Explorer, FolderSync)
- iOS (via FileBrowser or SMB support)
- MacOS, Windows, Linux
2. Phone Backups
Using FolderSync, our family phones back up photos and files daily to their respective datasets in '/backups'.
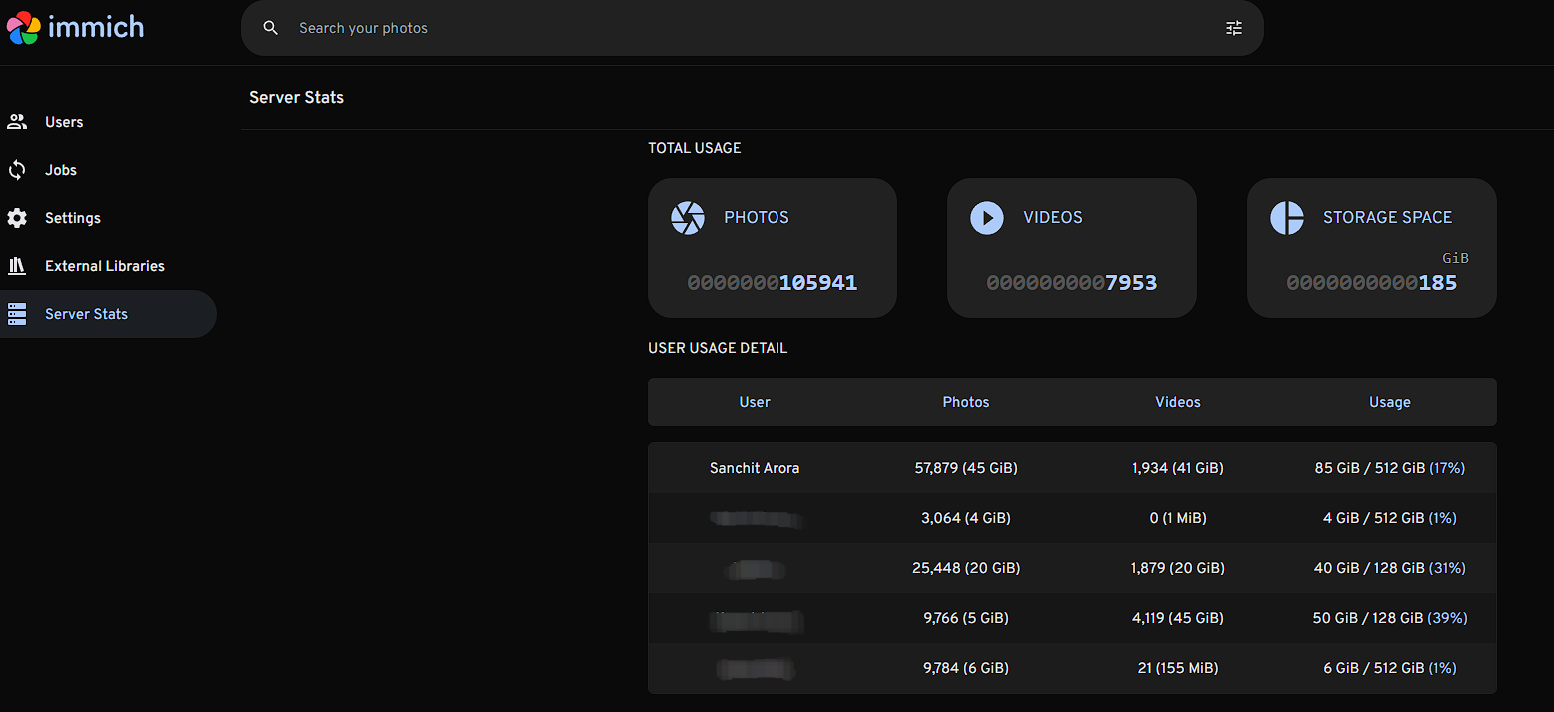
3. Personal Google Photos Alternative
Now we use Immich, a beautiful self-hosted media server:
- Indexes 100K+ photos & videos
- Allows user-specific accounts
- Handles albums, face recognition, and timeline views
I migrated all photos, videos, albums from Google using immich-go.
Image: Immich server usage statistics
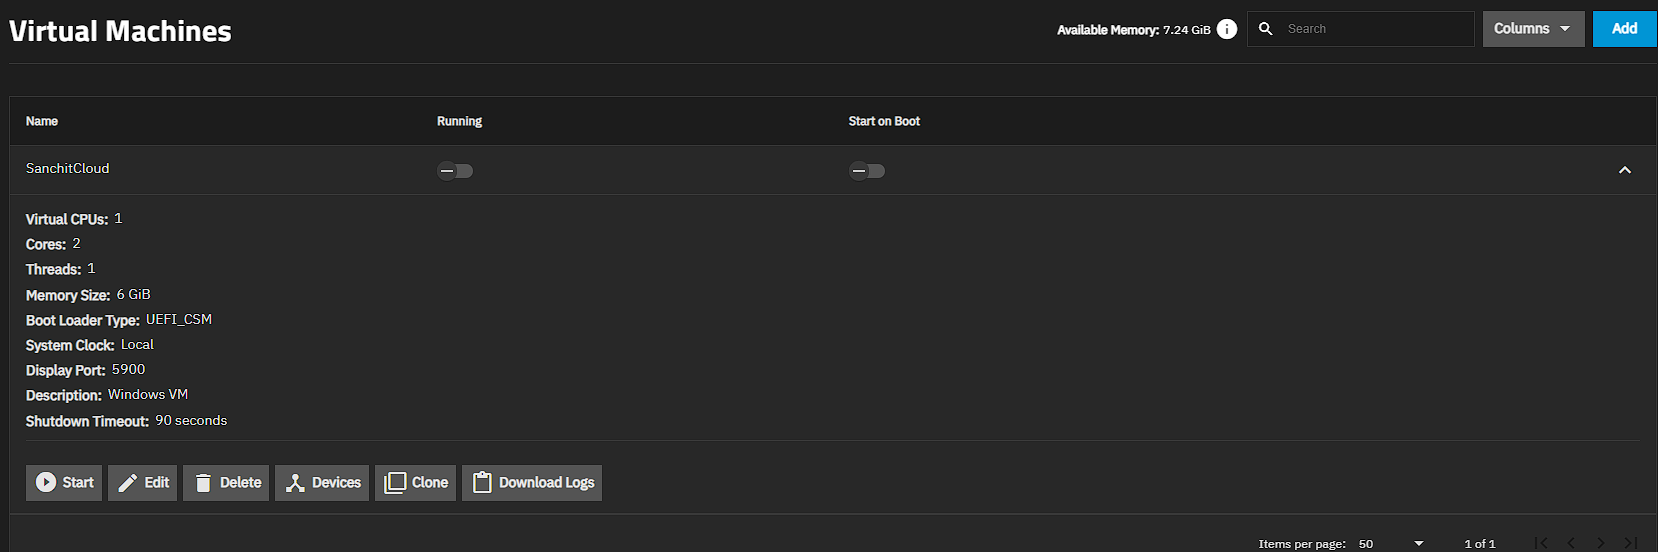
4. Windows Virtual Machine
A lightweight Windows VM runs on TrueNAS:
- 6 GB RAM, 2 cores
- Accessible even on phone via VNC display on browser
- Used for quick Office edits and remote desktop access from mobile
Image: Virtual machine details
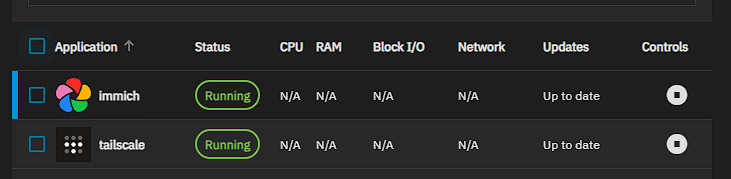
5. App Hosting
Running apps like:
immich: photo/video managementtailscale: remote access from anywhere
Image: Running applications
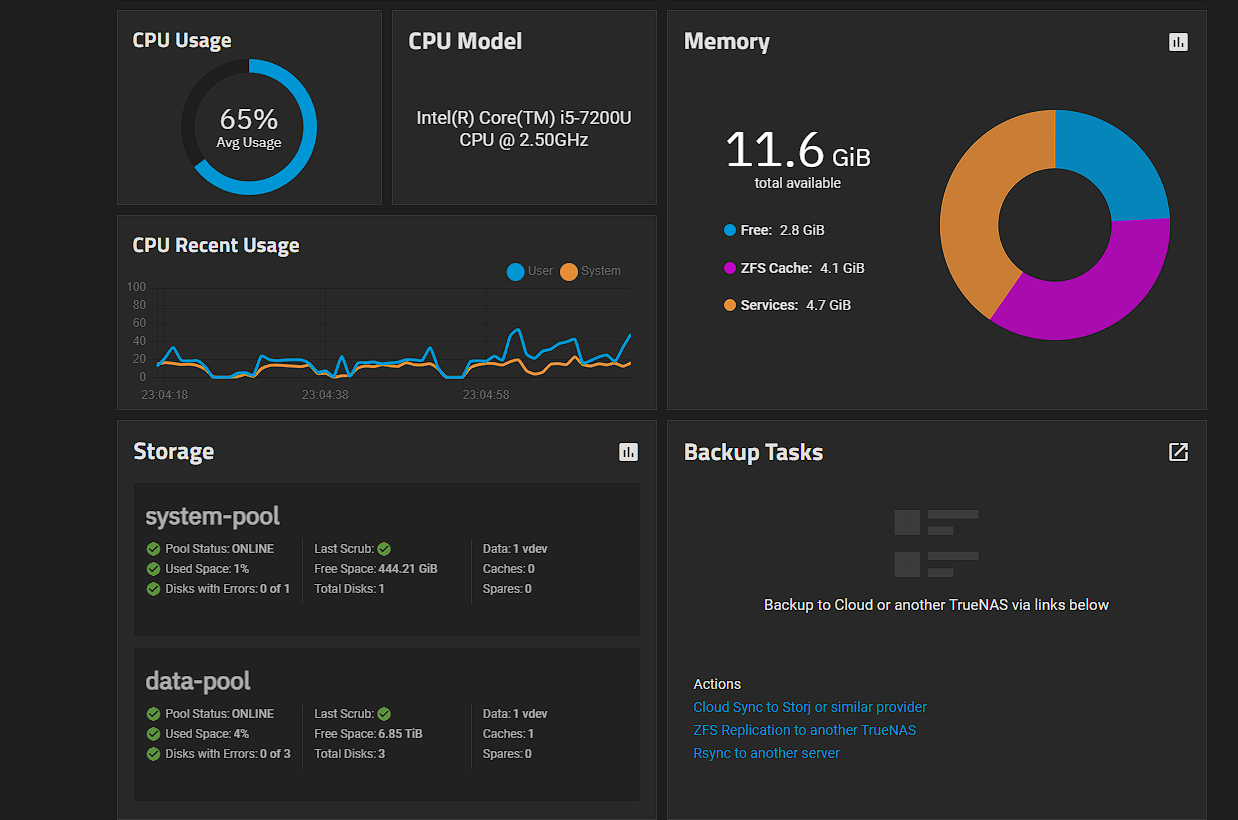
6. Monitoring & Protection
- Disk health checks
- S.M.A.R.T. status monitoring
- Daily scrubs
- ZFS snapshots planned
Image: System overview dashboard
Graceful Shutdowns
While my UPS doesn’t support network monitoring, it gives a ~15-minute backup buffer. I plan to use a lightweight Linux script that listens through the laptop’s microphone for the characteristic beep sound of the UPS. Once detected, the script will safely shut down all services and power off the system to prevent data corruption. This workaround is especially useful for non-smart UPS units and makes use of the laptop’s built-in hardware.
What’s Next?
This setup is just the beginning:
-
Upgrade Host: Replace old laptop with low-power PC (e.g., Intel NUC or mini-ITX build)
-
Add More Apps:
- Nextcloud for syncing and calendars
- Jellyfin or Plex for media streaming
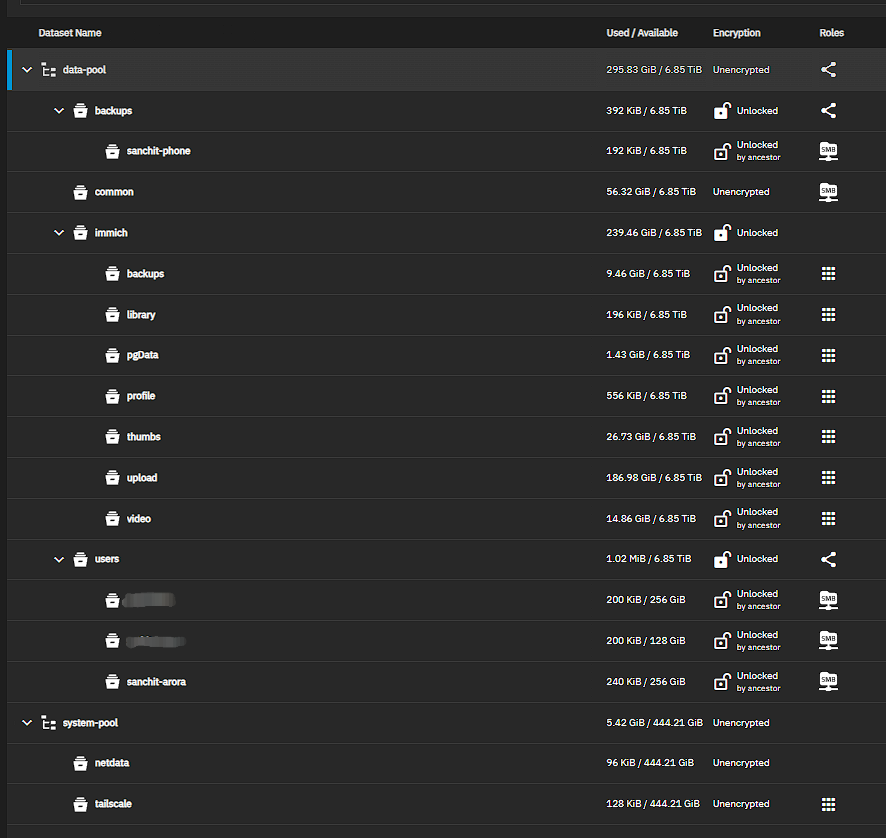
Image: Dataset structure overview
Final Thoughts
Self-hosting isn’t just about saving money—it’s about owning your data, understanding your digital infrastructure, and building a cloud on your terms. From cross-platform file access to automated backups and virtual machines, this setup powers our digital lives—without relying on big tech.
And it’s just getting started.